Seperti judul nya , sekarang saya mau membahas cara expose app/pod di kubernetes menggunakan cloudflare . Apasih Cloudflar ituu ? mari bahas sebentar .

Cloudflare adalah sebuah perusahaan teknologi yang menyediakan berbagai layanan keamanan dan kinerja untuk situs web dan aplikasi internet. Layanan utama yang mereka tawarkan adalah Content Delivery Network (CDN), yang bertujuan untuk meningkatkan kecepatan dan kinerja situs web dengan menyimpan salinan konten situs di berbagai lokasi server di seluruh dunia.
Mungkin Garis besar nya itu , apabila kurang puas silahkan googling lagi gan 😁 .
Sebenar nya tutorial ini sudah di share oleh situs resmi nya tetapi disini saya mencoba menjelaskan sedikit dikarenakan mungkin ada yang kesusahan saat membaca dokumentasi bahasa inggris (seperti saya) .
Dari web resmi nya di jelaskan seperti ini :
Langsung tahap eksekusi nya aja
Install Cloudflare#
atau lebih mudah nya , ikutin step2 nya
1
| wget https://github.com/cloudflare/cloudflared/releases/latest/download/cloudflared-linux-amd64.deb
|
setelah manifest di download , install manifest tersebut
1
| sudo dpkg -i cloudflared-linux-amd64.deb
|
Verifikasi bahwa cloudflare telah di install

Setup Cloudflare#
Login Cloudflare
1
| cloudflared tunnel login
|

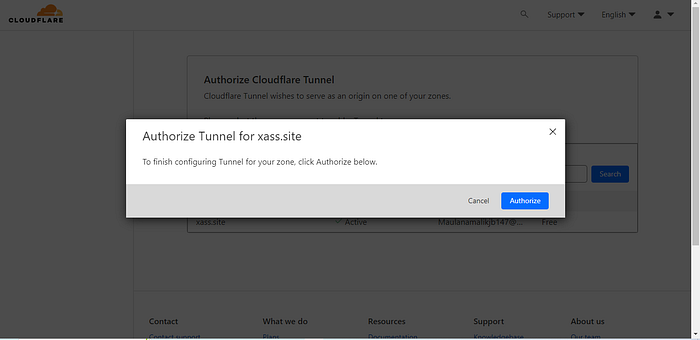
Salin link tersebut di browser dan login menggunakan akun masing — masing kalian . Oh iya sebelum nya domain yang dimilikin kalian harus ter integrasi dengan cloudflare nya ya , untuk tutorial nya bisa googling aja .
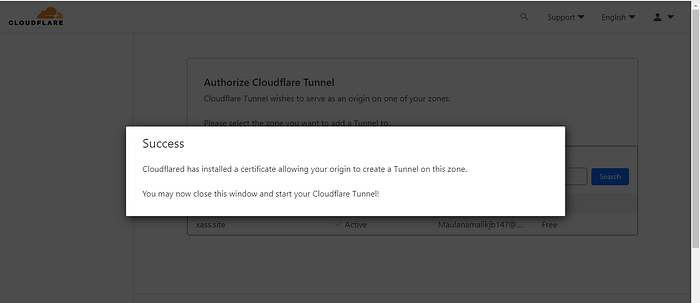
setelah login pilih authorize
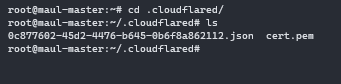
otomatis si terminal tadi telah berjalan

Buat tunnel kalian
1
2
3
4
| cloudflared tunnel create example-tunnel
Tunnel credentials written to /Users/cf000197/.cloudflared/ef824aef-7557-4b41-a398-4684585177ad.json. cloudflared chose this file based on where your origin certificate was found. Keep this file secret. To revoke these credentials, delete the tunnel.
Created tunnel example-tunnel with id ef824aef-7557-4b41-a398-4684585177ad
|
Setelah tunnel di buat , upload tunnel credintial ke secret kubernetes
1
2
| kubectl create secret generic tunnel-credentials \
--from-file=credentials.json=/Users/cf000197/.cloudflared/ef824aef-7557-4b41-a398-4684585177ad.json
|
Untuk lokasi file nya kalian bisa di cek di user kalian di directory
Verifikasi , secret sudah di buat apa belum

Apabila secret berhasil di buat , setup DNS record di akun cloudflare kalian caranya : domain kalian > DNS > Records
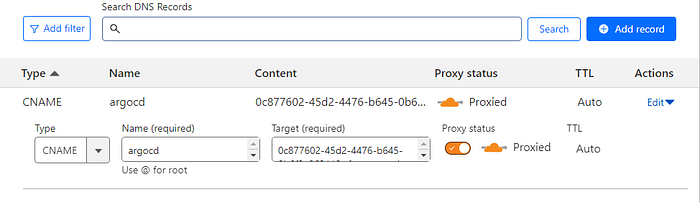
Untuk di target nya silahkan isi dengan idtunelkalian.cfargotunnel.com , untuk cek name nya isi bebas (ini untuk subdomain) , untuk cek idtunel nya seperti ini. ujung nya tambahkan .cfargotunnel.com

Setelah setup dnsrecord dan setup cloudflare sudah , sekarang deploy deployment cloud flare nya . Untuk manifest ada di sini https://github.com/cloudflare/argo-tunnel-examples/blob/master/named-tunnel-k8s/cloudflared.yaml . Atau bisa juga copas dari sini
  1
  2
  3
  4
  5
  6
  7
  8
  9
 10
 11
 12
 13
 14
 15
 16
 17
 18
 19
 20
 21
 22
 23
 24
 25
 26
 27
 28
 29
 30
 31
 32
 33
 34
 35
 36
 37
 38
 39
 40
 41
 42
 43
 44
 45
 46
 47
 48
 49
 50
 51
 52
 53
 54
 55
 56
 57
 58
 59
 60
 61
 62
 63
 64
 65
 66
 67
 68
 69
 70
 71
 72
 73
 74
 75
 76
 77
 78
 79
 80
 81
 82
 83
 84
 85
 86
 87
 88
 89
 90
 91
 92
 93
 94
 95
 96
 97
 98
 99
100
| ---
apiVersion: apps/v1
kind: Deployment
metadata:
name: cloudflared
spec:
selector:
matchLabels:
app: cloudflared
replicas: 2 # You could also consider elastic scaling for this deployment
template:
metadata:
labels:
app: cloudflared
spec:
containers:
- name: cloudflared
image: cloudflare/cloudflared:2022.3.0
args:
- tunnel
# Points cloudflared to the config file, which configures what
# cloudflared will actually do. This file is created by a ConfigMap
# below.
- --config
- /etc/cloudflared/config/config.yaml
- run
livenessProbe:
httpGet:
# Cloudflared has a /ready endpoint which returns 200 if and only if
# it has an active connection to the edge.
path: /ready
port: 2000
failureThreshold: 1
initialDelaySeconds: 10
periodSeconds: 10
volumeMounts:
- name: config
mountPath: /etc/cloudflared/config
readOnly: true
# Each tunnel has an associated "credentials file" which authorizes machines
# to run the tunnel. cloudflared will read this file from its local filesystem,
# and it'll be stored in a k8s secret.
- name: creds
mountPath: /etc/cloudflared/creds
readOnly: true
volumes:
- name: creds
secret:
# By default, the credentials file will be created under ~/.cloudflared/<tunnel ID>.json
# when you run `cloudflared tunnel create`. You can move it into a secret by using:
# ```sh
# kubectl create secret generic tunnel-credentials \
# --from-file=credentials.json=/Users/yourusername/.cloudflared/<tunnel ID>.json
# ```
secretName: tunnel-credentials
# Create a config.yaml file from the ConfigMap below.
- name: config
configMap:
name: cloudflared
items:
- key: config.yaml
path: config.yaml
---
# This ConfigMap is just a way to define the cloudflared config.yaml file in k8s.
# It's useful to define it in k8s, rather than as a stand-alone .yaml file, because
# this lets you use various k8s templating solutions (e.g. Helm charts) to
# parameterize your config, instead of just using string literals.
apiVersion: v1
kind: ConfigMap
metadata:
name: cloudflared
data:
config.yaml: |
# Name of the tunnel you want to run
tunnel: example-tunnel
credentials-file: /etc/cloudflared/creds/credentials.json
# Serves the metrics server under /metrics and the readiness server under /ready
metrics: 0.0.0.0:2000
# Autoupdates applied in a k8s pod will be lost when the pod is removed or restarted, so
# autoupdate doesn't make sense in Kubernetes. However, outside of Kubernetes, we strongly
# recommend using autoupdate.
no-autoupdate: true
# The `ingress` block tells cloudflared which local service to route incoming
# requests to. For more about ingress rules, see
# https://developers.cloudflare.com/cloudflare-one/connections/connect-apps/configuration/ingress
#
# Remember, these rules route traffic from cloudflared to a local service. To route traffic
# from the internet to cloudflared, run `cloudflared tunnel route dns <tunnel> <hostname>`.
# E.g. `cloudflared tunnel route dns example-tunnel tunnel.example.com`.
ingress:
# The first rule proxies traffic to the httpbin sample Service defined in app.yaml
- hostname: tunnel.example.com
service: http://web-service:80
# This rule sends traffic to the built-in hello-world HTTP server. This can help debug connectivity
# issues. If hello.example.com resolves and tunnel.example.com does not, then the problem is
# in the connection from cloudflared to your local service, not from the internet to cloudflared.
- hostname: hello.example.com
service: hello_world
# This rule matches any traffic which didn't match a previous rule, and responds with HTTP 404.
- service: http_status:404
|
NOTE :
Di bagian configmap isi values tunnel: dengan nama tunnel yang tadi sudah di buat

Di bagian hostname: isi subdomain dan domain yang telah di setup di dns record tadi
Di bagian Service isi service kalian yang mau di ekspose . Untuk penulisan url service format nya yaitu :
..svc.cluster.local
Example :
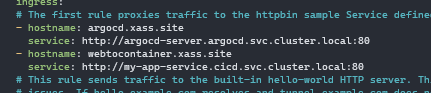
Apabila hanya 1 Service yang akan di ekspose silahkan masukan hostname dan service nya 1 saja , Untuk Deployment dan Secret nya di haruskan 1 namespace .
Apabila semua setup sudah dilakukan sekarang cek subdomain tersebut apakah berhasil atau tidak

Voilaaa , Ekspose service kubernetes ke internet telah berhasil. Mungkin sample sederhana itu yang bisa saya share , Mohon maaf apabila ada kalimat yang susah dipaham / kurang mengerti / terlalu berbelit2 , sekian ges chersss. ☕
